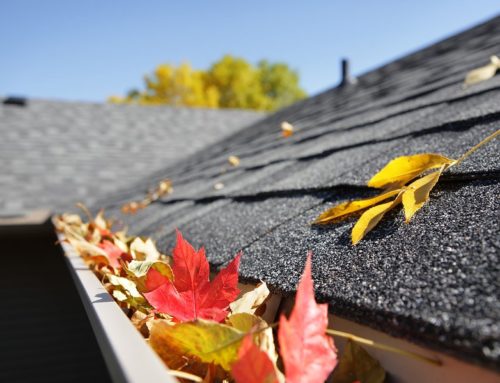
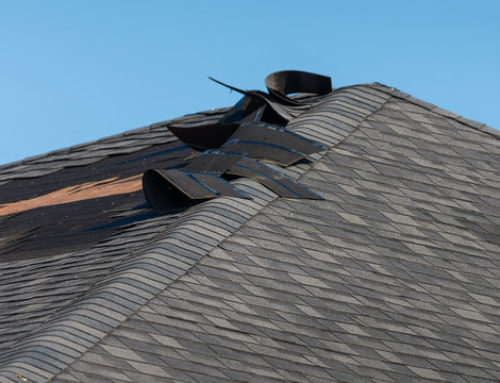
Is it time to replace the roof on your home or business? Are shingles missing or broken; do you have ice dam issues; or do you have water getting under the shingles on your roof? If the answer to any of these questions is yes; then it is time for a new roof! In many cases, a new roof can be supplied by a professional roofing company and covered financially by your homeowner’s insurance policy. But how do you know!?!
If you are thinking about repairing your roof yourself it may be time to ask a few questions. Do you have enough ladders to reach all areas of your roof, including that second or third level? Are you good with heights? What about falling from heights? Do you know the load of your home’s roof, including the weight of the current shingles on your roof and possibly the weight of the shingles? Are you able to carry bundles of new roofing shingles (between 60-80 pounds each) up the ladder, over and over again? Did you check the weather because this is going to take a few days? Did you get your permit (if required) before you started? What about stripping your roof and what you are going to do with all those old hazardous shingles?
Professional Roofers have the knowledge, experience and safety equipment to keep everyone working on your project safe, not to mention the experience to strip the roof, dispose of old shingles correctly, and install your new roof with speed and efficiency.
We want to give you an idea of what will happen when you have a professional roofer, like Berlet Roofing, come out and replace your roof.

Free Inspection
Like most roofing professionals, the team at Berlet Roofing will send out one of their professional roofers to inspect your roof for damage. During the inspection, they will take the time to get up on the roof, check for loose or missing shingles, and evaluate the roof for weather, water or weight damage. They will take measurements of your roof for any damage they find and provide you with their findings. The best roofers will help provide you documentation for your insurance provider to help start the claims process for replacing any damage.
Working With Your Insurance
If roof damage is found, repairing it may be covered by your homeowner’s insurance. Berlet Roofing specializes in working with Homeowners Insurance companies to help pay for the repairs or replacement your roof may require.
Setup Appointment to Replace Your Roof
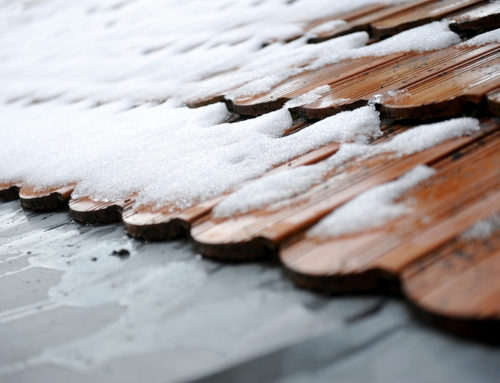
Depending on the size of your roof it may take anywhere from 1 day to 5 days to replace the roof on your home or business. We avoid roofing your house in below-freezing temperatures. The shingles won’t stick together, which makes them prone to wind damage. A couple of cold days won’t cause trouble, but after weeks and months, the adhesive strips on the shingles can attract dust and fail to seal even when the weather does warm up. We also try to avoid working on HOT sunny days when the temperature is above 90 degrees. The ice-and-water underlayment gets overly sticky and difficult to work with, and the shingles get soft and are easily scuffed by feet and tools.
Removing Old Shingles
At Berlet Roofing we do our best to avoid damage to your yard and property. To help us with this please clean up below your roof first. If you have movable items near your house relocate them. A bunch of shingles and nails will soon be falling on them. Invest in a few large tarps to protect your plants and landscaping and to catch all those nails that will rain down off the roof. If you don’t have them, we do, but you know your yard best and we want to ensure you are happy with the overall experience of working with us.
Once the ground is prepped, we start by removing your old roof first. This includes the existing shingles, and removing all the old nails, or we pound them FLAT into the wood. Protruding nails will damage the new shingles and cause leaks right away. This step is crucial, as it is impossible to install new flashing and underlayment correctly if we don’t remove your old roof. Old shingles, flashing and nails will be removed, and properly disposed of. We all walk through the yard with magnets to insure we pick up as many nails as possible that may have come raining down from the roof.
Installing Drip Edge
Metal drip edge isn’t usually required (check with a local building official), but it gives roof edges a nice finished look, prevents shingles from curling over the edge, and keeps water from running directly down your fascia boards.
Installing the self-stick underlayment
When an ice dam forms on a roof, ice and water can work their way up under the shingles and leak back into the house. Strong winds can also blow rainwater under shingles. Self-stick roofing ice-and-water underlayment can prevent this because it sticks to the roof decking to seal out water. It also seals around nails, which keeps water from leaking through nail holes.
Waterproofing Valleys
Roof valleys channel a lot of water, so they need extra protection. Installing extra underlayment in the direction and area water will flow will provide you with better overall protection in these high water concentration areas. Self-stick roofing ice-and-water underlayment is added to help with wicking water away from the valleys as well. Valleys are finished with shingles cut to fit.
Begin with starter shingles
Water can get in the seams between any two shingles, but that’s OK because shingles overlap and the seams are staggered. But if you don’t use starter shingles, water will run in between the seams on the first row and right onto the underlayment, increasing the odds of a leak. The starter row shingles are only half as wide as a full shingle. If they were full size, the top half of the first row would have three layers of shingles instead of the two the rest of the roof has, causing a visible hump.

Install the Shingles
Laying shingles isn’t easy, but it’s probably the simplest part of roofing a house. Using a roofing gun to secure the shingles, we will stagger each row so the seams don’t line up. We follow the stagger pattern recommended by the manufacturer of your shingles and use partial shingles to start subsequent rows.
Every shingle brand has its own nailing pattern requirement. The pitch of your roof and the wind conditions in your area also affect how many nails to use and where. In most cases we use 1-1/4-in. zinc-coated roofing nails.
Every shingle brand has its own nailing pattern requirement. The pitch of your roof and the wind conditions in your area also affect how many nails to use and where. In most cases we use 1-1/4-in. zinc-coated roofing nails. Some architectural shingles are partially laminated (two layers), and others are fully laminated, which gives them more of a textured look, similar to wood shakes. Because of the extra material, architectural shingles are heavier. Some can handle winds up to 150 mph, which is twice the wind rating of many three-tab shingles.
Architectural shingles are easier to install because you don’t have to worry about lining up the tabs vertically. The life span depends on the quality of the shingle. Both styles are available with 25-year and 30-year warranties. Expect to pay about 15 to 20 percent more for standard architectural shingles than for standard three-tabs.
Architectural vs. Three-Tab Shingles
Some architectural shingles are partially laminated (two layers), and others are fully laminated, which gives them more of a textured look, similar to wood shakes. Because of the extra material, architectural shingles are heavier. Some can handle winds up to 150 mph, which is twice the wind rating of many three-tab shingles.
Architectural shingles are easier to install because you don’t have to worry about lining up the tabs vertically. The life span depends on the quality of the shingle. Both styles are available with 25-year and 30-year warranties. Expect to pay about 15 to 20 percent more for standard architectural shingles than for standard three-tabs.
Working around vents and stacks
Installing shingles around attic vents, plumbing vent stacks, and furnace stacks are basically the same process. The main difference is that we install a piece of self-stick underlayment around all the stacks, and roll the felt paper over the vent holes, and cut out the holes to fit before adding shingles around the stacks trimming them to fit.
Seal it up
Before we ladders away, we sweep all the debris off the roof, and then seal all the exposed nails on your vents and stack flashing. Our roofers prefer clear silicone like sealants that are as sticky as model glue and lasts for years. And remember, these seal areas require maintenance and should be inspected every few years.